ONESOURCE
Workpapers Help
Save To Platform
Workpapers provides several Add-in options for pushing workpapers into the Platform:
|
Save To Platform Icon
To save a new workpaper or workpaper changes to the Platform:
Save the workpaper on your computer before saving it to the Platform.
- Select the Save To Platform icon.

Ignore the sub-menu items Save This Version or Save to Platform As.
- If you are saving changes to a workpaper that already exists in the Platform, skip to step 8 below.
-
In Workpaper name, type a name for the workpaper.
The default name is the file name.
- If you do not want to save the workpaper to a specific folder, skip step 5 below. To add your workpaper to a folder, select Add to a folder.
If you do not specify a folder, the workpaper is saved to the All Workpapers folder.
- Select a folder from the drop-down list, or select Create a new folder to set up a new folder to store the workpaper.
If you decide you no longer want to add to a folder, select Do not add to a folder.
- If you see Attributes, select a value in Dataset.
-
Select Save.
-
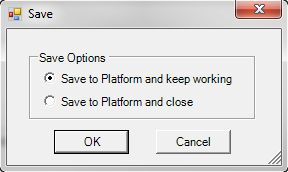
Select one of the Save Options, and then select OK.
- Save to Platform and keep working keeps the workpaper open after you save to the Platform and marks it as checked out.
- Save to Platform and close closes the workpaper and checks in the workpaper to the Platform.
- Select OK to confirm your work.
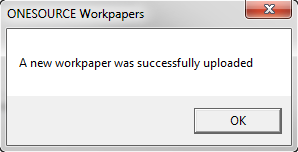
- Pop-up for new workpaper:
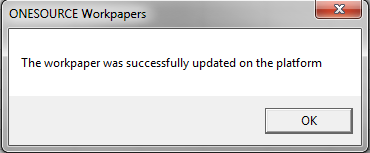
- Pop-up for updating existing workpaper:
- Pop-up for new workpaper:
Save This Version
Saving a specific version of a workpaper allows you to retain data from any point in time. ONESOURCE Workpapers stores each version of your workpaper, allowing you to review your information from different time periods without overwriting any data.
When you save a version of a workpaper, remember the following:
- You must save workpapers to the Platform before you can use Save This Version.
- ONESOURCE Workpapers does not append the workpaper name with a version number when you save a new version.
- Versioned workpapers open as read-only. To make changes to a version of a workpaper, either revert to the original version of the workpaper and save as a different name, or open and save the version as a new workpaper.
- After you save a version, you cannot delete that version.
- ONESOURCE Workpapers only saves up to five versions of workpapers on the Platform. If you save a sixth version, it overwrites the first version of your workpaper.
To save a specific version of a workpaper to the Platform, select Save To Platform > Save This Version.

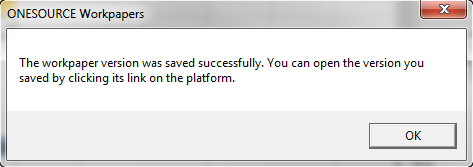
A message appears saying that the workpaper was saved (uploaded).
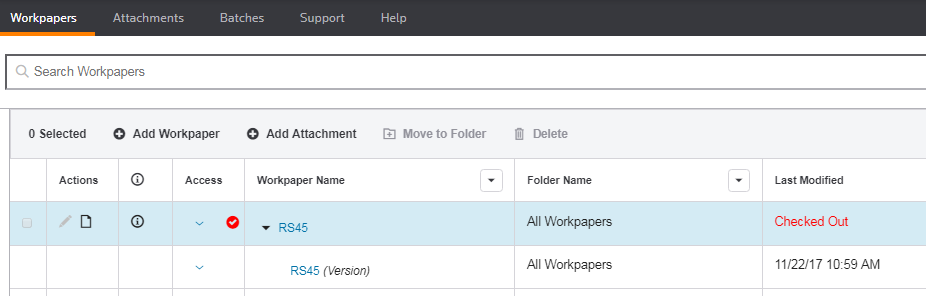
The Workpapers grid now includes the specific versions of the saved workpapers as shown in the following example.
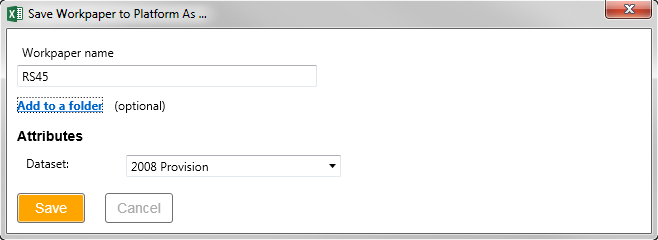
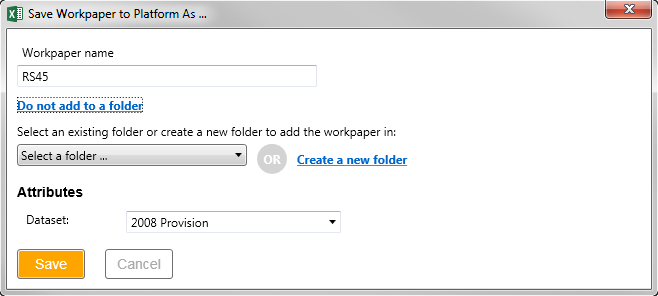
Save To Platform As
To create a copy of an existing platform workpaper or to add a platform workpaper to a different folder:
- Select Save To Platform, and then select Save To Platform As.

- If you want to create a different name, change the value in Workpaper name.
You must modify either the wokrpaper's name or its folder.
- If you do not want to save the workpaper to a specific folder, skip to step 5 below. To add your workpaper to a folder, select Add to a folder.
- Select a folder from the drop-down list, or select Create a new folder to set up a new folder to store the workpaper.
If you decide you no longer want to add to a folder, select Do not add to a folder.
- If you see Attributes, select a value in Dataset.
- Select Save.
- Select one of the Save Options, and then select OK.
- Save to Platform and keep working keeps the workpaper open after you save to the Platform and marks it as checked out.
- Save to Platform and close closes the workpaper and checks in the workpaper to the Platform.
- Select OK in the confirmation pop-up.
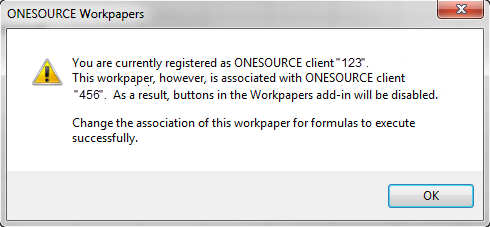
If you are a ONESOURCE Firm Edition user and you try to save a workbook that is associated with another client, you receive a warning message. For example, if your user is registered to client 123, but the workpaper is associated with the client 456, you receive a warning and the menu options in Function Definition and Execution are unavailable. See ONESOURCE Firm Edition: Change Workpaper Association.